Incline Push-Ups
An incline push-up is a push-up done with your hands on a raised surface instead of the floor, and it is the friendliest way to start. The higher the surface, the less of your bodyweight you press, so a kitchen counter is far easier than a low bench. That makes the incline push-up the most adjustable stepping stone toward full floor push-ups: pick a height you can control today, then lower it as you get stronger.
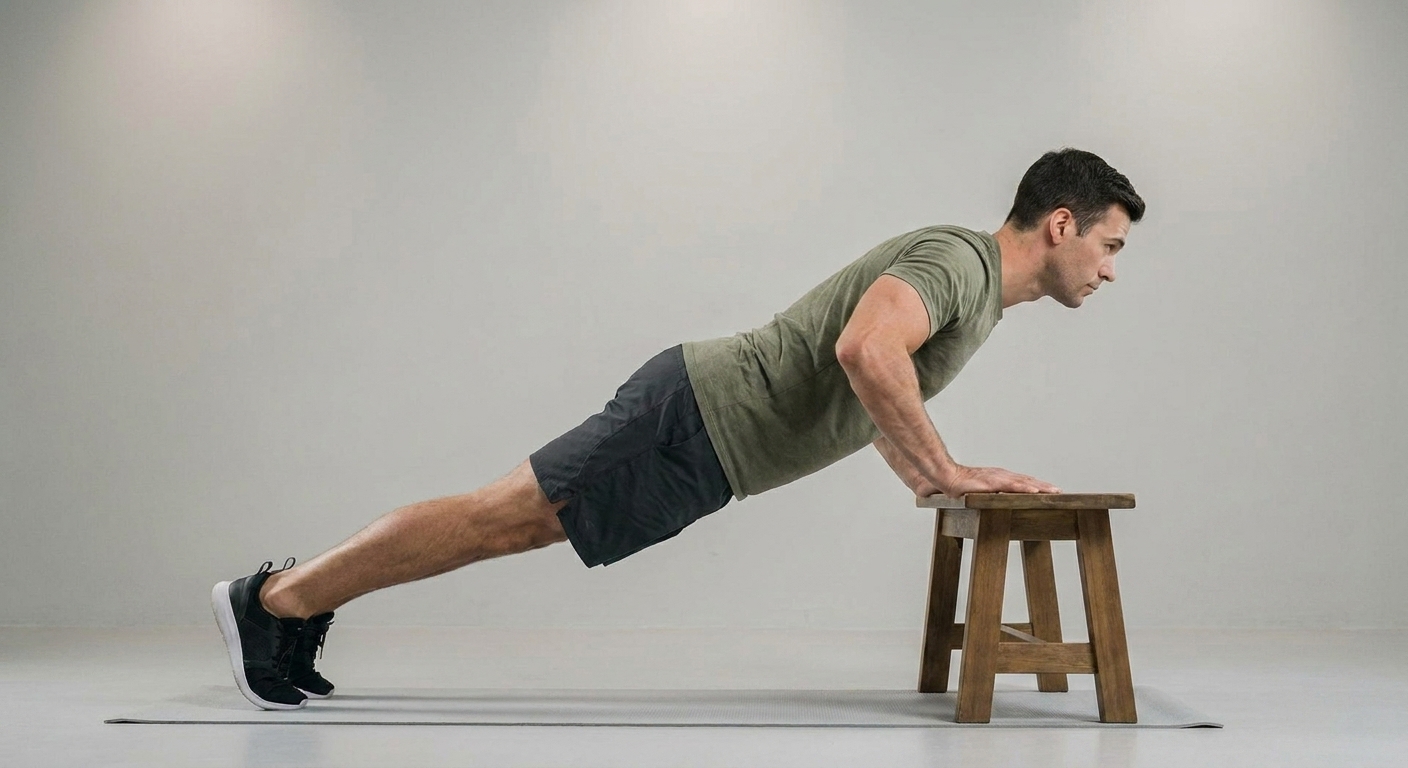
How to do an incline push-up
- Place your hands on a sturdy raised surface — a bench, a step, a low wall, or a kitchen counter — a little wider than shoulder width.
- Walk your feet back until your body forms one straight line from head to heels. Squeeze your glutes and brace your core.
- Bend your elbows and lower your chest toward the surface, keeping your elbows at roughly 45 degrees from your body.
- Stop when your chest is close to the surface, then press back up until your arms are straight.
- Keep the whole body rigid the entire time — the line from head to heels should not change.
Muscles worked
Incline push-ups train the same muscles as floor push-ups, just with less load: the chest (pectorals), the triceps at the back of the upper arms, and the front of the shoulders. Your core, glutes, and legs work as stabilisers to hold that straight-line position. Because the angle takes some weight off your hands, the effort on each rep is lower than on the floor — which is exactly the point.
Benefits
- An accessible entry point. If a floor push-up is still out of reach, an incline lets you practise the real movement with good form from day one.
- The most adjustable regression. One surface change adds or removes difficulty. Higher is easier, lower is harder — no other push-up scales this smoothly.
- Wrist-friendlier. A higher angle usually puts less pressure through the wrists than the floor, which helps if wrist strain has held you back.
- Trains the full pattern. You groove the same straight-body, elbow-tucked technique you will need on the floor later.
Common mistakes
- Hips sagging or piking. Letting the hips drop or lifting them into a peak takes the work off your chest. Keep one straight line and brace your core.
- Dropping to a low surface too soon. If your form breaks down, the surface is too low. There is no prize for rushing to the floor.
- Partial range. Lower until your chest is near the surface. Shallow half-reps feel productive but build little.
- Flared elbows. Elbows pointing straight out to the sides strains the shoulders. Keep them tucked to around 45 degrees.
Difficulty and progressions
Progress by lowering the surface over time. Start at a height where you can do clean reps, aim for 3 sets of 8 to 12 with good form, and once that feels easy, move to a lower surface: wall, then counter, then a table, then a bench, then a low step, and finally the floor. Take a lower surface only when your reps stay smooth and your body stays straight.
Knee push-ups are another useful regression and a good alternative if you have no suitable surface — many people mix both on the way up. When floor push-ups start to feel within reach, test a few and see how they go.
Explore all push-up variations, dial in your proper push-up form, or follow the full 100 push-ups programme.